Category: Blog

  • Backyard Construction Access: What to Plan Before Work Starts

    Backyard construction access is worth discussing before you choose the final patio or retaining wall layout. A clear plan for getting people, materials and equipment to the work area helps everyone understand what the project involves. For homeowners around Winston-Salem, Mocksville and nearby communities, the side yard and driveway deserve a place in the estimate conversation.

    Walk the full route to the work area

    Start where a delivery vehicle could stop, then walk toward the proposed project. Note gates, steps, tight turns, low branches and changes in elevation. A wide opening at the street does not tell the whole story if the route narrows beside the house.

    Share photos of the route before the site visit, including the narrowest points. Let the contractor assess equipment options and working clearances. Do not remove a fence panel or trim a tree simply because you assume it will be necessary.

    Agree on delivery and material storage areas

    Ask where materials could be unloaded and stored, where excavated material would go, and which parts of the driveway need to remain available. Mark these proposed areas on a simple sketch. Discuss access for everyday parking, trash collection and deliveries as well as construction.

    Identify surfaces and landscaping you want protected. Ask what protection is proposed and what restoration is included in the written scope. Temporary access across a lawn may require follow-up work; clarify the plan instead of assuming every disturbed area will be restored in the same way.

    Point out utilities and features that are easy to miss

    Tell the contractor about irrigation, landscape lighting, drainage pipes, septic components and lines serving a shed or other detached structure. Share any records you have, but do not treat a sketch as a substitute for locating buried lines.

    Confirm who will coordinate utility locating before excavation. NC811 explains that utility owners typically locate their own facilities; private lines may need a separate locator. Discuss those private facilities explicitly rather than assuming one request identifies everything underground.

    Plan how the household will use the property

    Identify a household entrance that can remain usable and discuss how the work area will be separated from normal activity. Tell the contractor about pets, children and any mobility needs before work begins. Agree on a contact person for questions and on how changes to access will be communicated.

    If another contractor is also working at the property, discuss the sequence together. Avoid planning a new planting bed or finish surface directly in a route that may still be needed for deliveries. Our paver patio planning guide can help you connect these practical details with the finished layout.

    Questions to bring to the estimate

    • Which route and gate will the crew use?
    • Where will deliveries and materials be placed?
    • What protection and cleanup are included?
    • Who handles locating utilities and identifying private lines?
    • Will fence removal, access changes or restoration be needed?
    • How will any change in the agreed scope be documented?

    Frequently asked questions

    Does a narrow gate rule out a backyard project?

    Not necessarily. Show the full route during the estimate. Equipment choices, handling methods and the scope need a site-specific review before anyone can say what is practical.

    Should I move everything before the estimate?

    Start by explaining what can move and what must stay. Wait for an agreed access plan before dismantling fences, relocating fixtures or making other substantial changes.

    Is cleanup the same as landscape restoration?

    Ask for both to be described. Removing leftover materials and restoring lawn, planting beds or other disturbed areas are different tasks. The written scope should explain what is included.

    Discuss your project with P&J

    P&J Outdoor Creations LLC helps homeowners plan hardscaping and outdoor construction around Winston-Salem, Mocksville, Lewisville, Clemmons and nearby communities. Call 704-738-8064 or request a free estimate to discuss your project and access needs.
  • Planning a Paver Walkway: From Driveway to Front Door

    Planning a Paver Walkway: From Driveway to Front Door

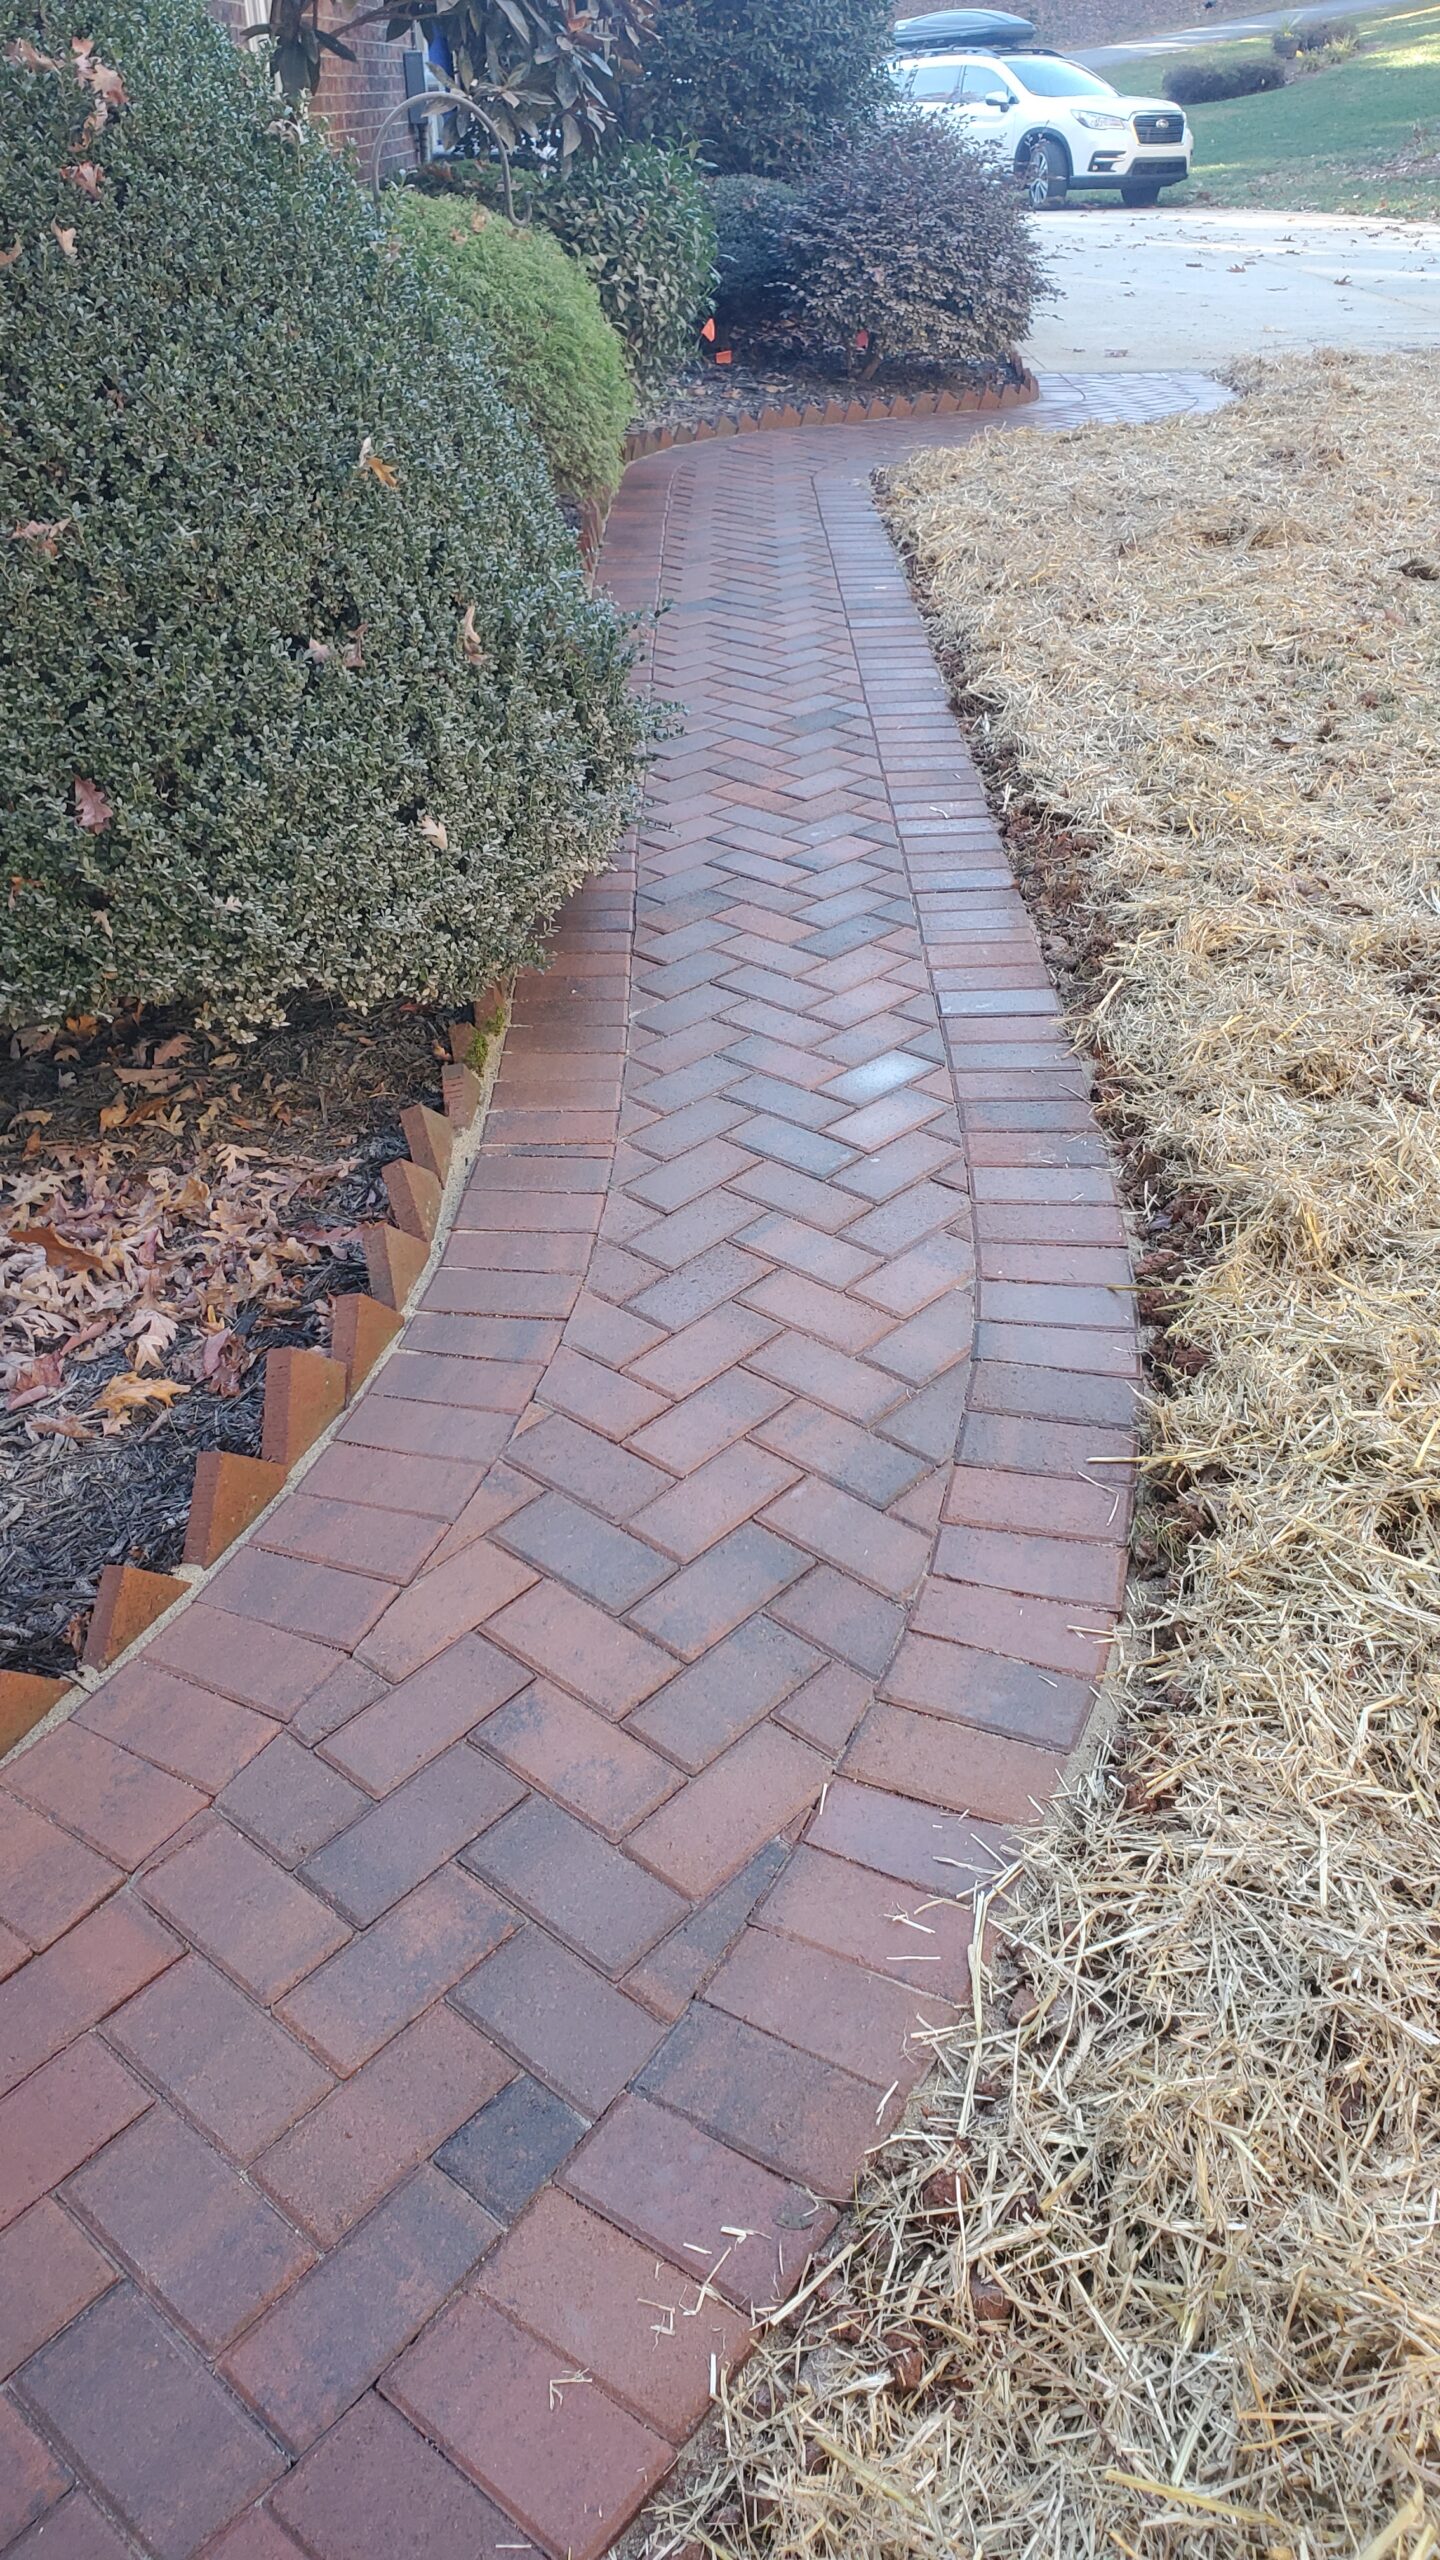
    A paver walkway should make the trip from your driveway to your front door feel natural. Before choosing a color or pattern, think about where people park, what they carry and how they reach the entrance. For homeowners around Winston-Salem and Mocksville, these everyday details are a useful starting point for a walkway estimate.

    Start with the route people actually use

    Walk from the usual parking spot to the door. Notice where you turn, step onto grass or squeeze past planting beds. A decorative curve can look appealing, but it should still lead somewhere useful. Sketch the driveway, porch steps, gates and existing paths before deciding on the route.

    Consider more than visitors arriving empty-handed. Picture bringing in groceries, moving a trash bin or walking beside someone. If a household member uses a mobility aid, explain that need at the beginning so the layout, clear space and transitions can be reviewed together.

    Check the entrances and transitions

    The connections at each end deserve as much attention as the middle. Show your contractor the driveway edge, bottom step, porch landing and any gate the walkway will pass through. Discuss how the finished surface will meet each one, rather than treating the path as a separate strip of paving.

    Keep door swings, downspouts, utility access and nearby equipment in the conversation. A wider area near an entrance may be useful for pausing or turning. Decide where planting beds will begin so mature plants do not crowd the walking route.

    Discuss water and the supporting layers

    Take photos after rain if you can do so safely. Show where puddles form, where runoff crosses the route and where downspouts discharge. Those observations help frame the site visit; they do not by themselves identify the correct drainage solution.

    The visible pavers are only part of the installation. The Concrete Masonry & Hardscapes Association construction guide discusses excavation, drainage, soil preparation, aggregate base and bedding as parts of an interlocking pavement system. Ask how these will be addressed for your property instead of assuming one base detail fits every site. Water entering a building or signs of structural movement need assessment beyond a decorative walkway design.

    Choose a pattern that supports the overall design

    Compare samples beside your existing brick, siding and driveway in daylight. Decide whether you want the walkway to blend in or stand out. A contrasting border can define its shape, while a simpler palette can keep attention on the entrance and landscape.

    Ask how the proposed pattern will meet curves and edges. Review a layout before construction so the border, main paving field and connections feel intentional. If a patio is also planned, consider the two spaces together; our paver patio planning guide covers the larger gathering area.

    Bring a short checklist to the estimate

    • Photos of the route, both endpoints and any wet spots.
    • Notes on who uses the path and what needs to pass along it.
    • Your preferred colors, borders and examples of layouts you like.
    • Questions about preparation, drainage, edge support and cleanup.
    • Any property restrictions or approvals that need checking before work begins.

    Frequently asked questions

    Should a front walkway be straight or curved?

    Start with the destination and how people move through the space. A straight route may be practical for direct access. A curve may work with existing beds or a change in direction. Compare both on a sketch before choosing.

    Can a walkway match an existing patio?

    Bring photos and any product information you have. Matching may be possible, but an intentional complementary color or border can also connect the spaces. Check actual samples rather than relying only on screen colors.

    What should I show the contractor before getting an estimate?

    Show the full route, driveway connection, entrance steps, drainage concerns and access for construction. Explain any plans for future landscaping so the walkway can be considered alongside them.

    Plan your walkway with P&J

    P&J Outdoor Creations LLC helps homeowners plan paver walkways and outdoor spaces around Winston-Salem, Mocksville and nearby communities. Call 704-738-8064 to discuss your project and request a free estimate.

  • Outdoor Kitchen Layout: What to Plan Before Building

    Outdoor Kitchen Layout: What to Plan Before Building

    An outdoor kitchen should fit the way you cook and gather. Before choosing finishes, think through the trip from your indoor kitchen to the grill, the space for serving food, and where guests will sit. These decisions help turn a wish list into a useful conversation with your contractor.

    For homeowners in Winston-Salem, Mocksville and nearby communities, the following outdoor kitchen layout checklist is a starting point for planning a comfortable backyard cooking area.

    Start with the meals you actually make

    Write down what you want to cook outside and how often. A grill with preparation space may cover your needs. If you regularly host larger gatherings, you may also want a serving counter or additional storage. Choose features for your routine rather than filling every available space with appliances.

    Separate your list into essentials and optional additions. That makes it easier to compare a focused first phase with a larger installation, without losing track of the features you will use most.

    Map the route from the house

    Imagine carrying a tray from your kitchen to the cooking area and returning with used dishes. Note doors, steps, gates and changes in surface along that route. A convenient path matters just as much as the appearance of the countertop.

    Keep the main walking route in mind when placing dining furniture. Guests should be able to reach their seats without passing through the cook’s workspace. If you are also planning a patio, consider the patio layout and kitchen location together.

    Plan places to prepare, cook and serve

    Sketch three activities on your plan: preparing food, cooking it, and setting it out for guests. Include somewhere to put ingredients and utensils before they reach the grill, plus a serving area that remains usable while someone is cooking.

    Draw furniture and appliance doors in their open positions. A layout can look spacious on paper but feel awkward when a cabinet, grill lid or chair is in use. Final dimensions and appliance clearances should follow the selected products’ instructions and the requirements that apply to your project.

    Choose appliances before finalizing the enclosure

    Bring the model information for any appliances you hope to include. Built-in equipment has specific installation requirements, and the surrounding construction needs to be planned around those products. Do not assume that a freestanding grill can be enclosed in the same way as a built-in model. For an example of product-specific planning, see Weber’s built-in installation guide; use the instructions for your own selected equipment.

    Discuss fuel, electrical and plumbing needs early with your contractor and the appropriate qualified trades. Ask who will confirm the applicable permits and inspections. Adding a sink, refrigerator or other equipment changes more than the look of the kitchen; it can affect the work needed to support it.

    Look at the whole outdoor setting

    Take photos of the proposed area from the house, yard and nearby seating. Include existing structures, planting, slopes and places where water collects. Tell your contractor how the area behaves after rain and which parts feel exposed to sun or wind.

    If you are considering a roof or pergola, make that part of the initial discussion. Cooking equipment, nearby materials and any overhead structure need to be evaluated together. A layout photo from another home is useful inspiration, but it is not an installation plan for your property.

    Make the estimate easier to compare

    Ask for a written scope that explains the proposed kitchen, base or patio work, utilities, finishes and any items supplied by you. Note what is excluded and which selections are still undecided. This helps you compare estimates that may otherwise describe very different projects.

    • Bring a few inspiration photos and explain what you like about each.
    • List your preferred appliances and any equipment you already own.
    • Mark your preferred cooking, serving and seating areas.
    • Identify access constraints, existing utilities and known drainage concerns.
    • Separate essential features from additions you could consider later.

    Outdoor kitchen planning questions

    Do I need a sink in an outdoor kitchen?

    It depends on how you expect to use the space. Consider the convenience alongside the additional plumbing scope. For some households, preparation space and a convenient route to the indoor kitchen may be the higher priority.

    Can an outdoor kitchen be added to an existing patio?

    An existing patio needs to be assessed for the proposed installation. Share its construction details if you have them, and ask your contractor to evaluate its condition, layout and suitability before assuming it can support the new work.

    What should I decide before requesting an estimate?

    Start with the proposed location, your cooking routine, essential appliances and a few photos. You do not need a finished design, but a clear list of priorities gives the contractor a useful starting point.

    Plan your outdoor cooking space with P&J

    P&J Outdoor Creations LLC serves Winston-Salem, Mocksville and nearby communities. Explore our completed projects for ideas, then request a free estimate to discuss an outdoor kitchen and gathering area that fits your property.

  • Planning Patio Seating and Lighting for Your Outdoor Space

    Planning Patio Seating and Lighting for Your Outdoor Space

    A patio feels inviting when its seating, lighting and walking space work together. If you are planning an outdoor living area around Winston-Salem, these questions can help you turn inspiration photos into a clear conversation about your own yard.

    Start with the way you want to spend time outside

    Picture an ordinary evening, not just a large party. Will you read in a quiet corner, eat with family or gather around a fire feature? List your two most important uses before choosing furniture or finishes. This gives the layout a purpose and helps you explain your priorities during an estimate.

    Compare built-in seating with movable furniture

    A seating wall can define the edge of a gathering area, while chairs can be rearranged as your needs change. You may prefer a combination. Bring the dimensions of furniture you already own and discuss how guests would move around it.

    Try laying out your furniture positions in the existing yard before making a final decision. Pay attention to the route between the house, seating area and lawn. A layout that looks spacious in a photograph may feel different with chairs pulled out and people moving through it.

    Plan lighting alongside the layout

    Think about what you want to see after sunset: the entrance to the patio, a change in level or the edge of a seating area. Share whether you prefer subtle accent lighting or a brighter setting for outdoor meals. Ask to review fixture placement and the proposed nighttime effect before approving the details.

    Discuss power, controls and responsibility for any electrical work as part of the proposal. Ask how the lights will be accessed for maintenance and whether their brightness or timing can be adjusted. Avoid choosing a fixture only from a daytime product photograph.

    Use project photos to explain the look

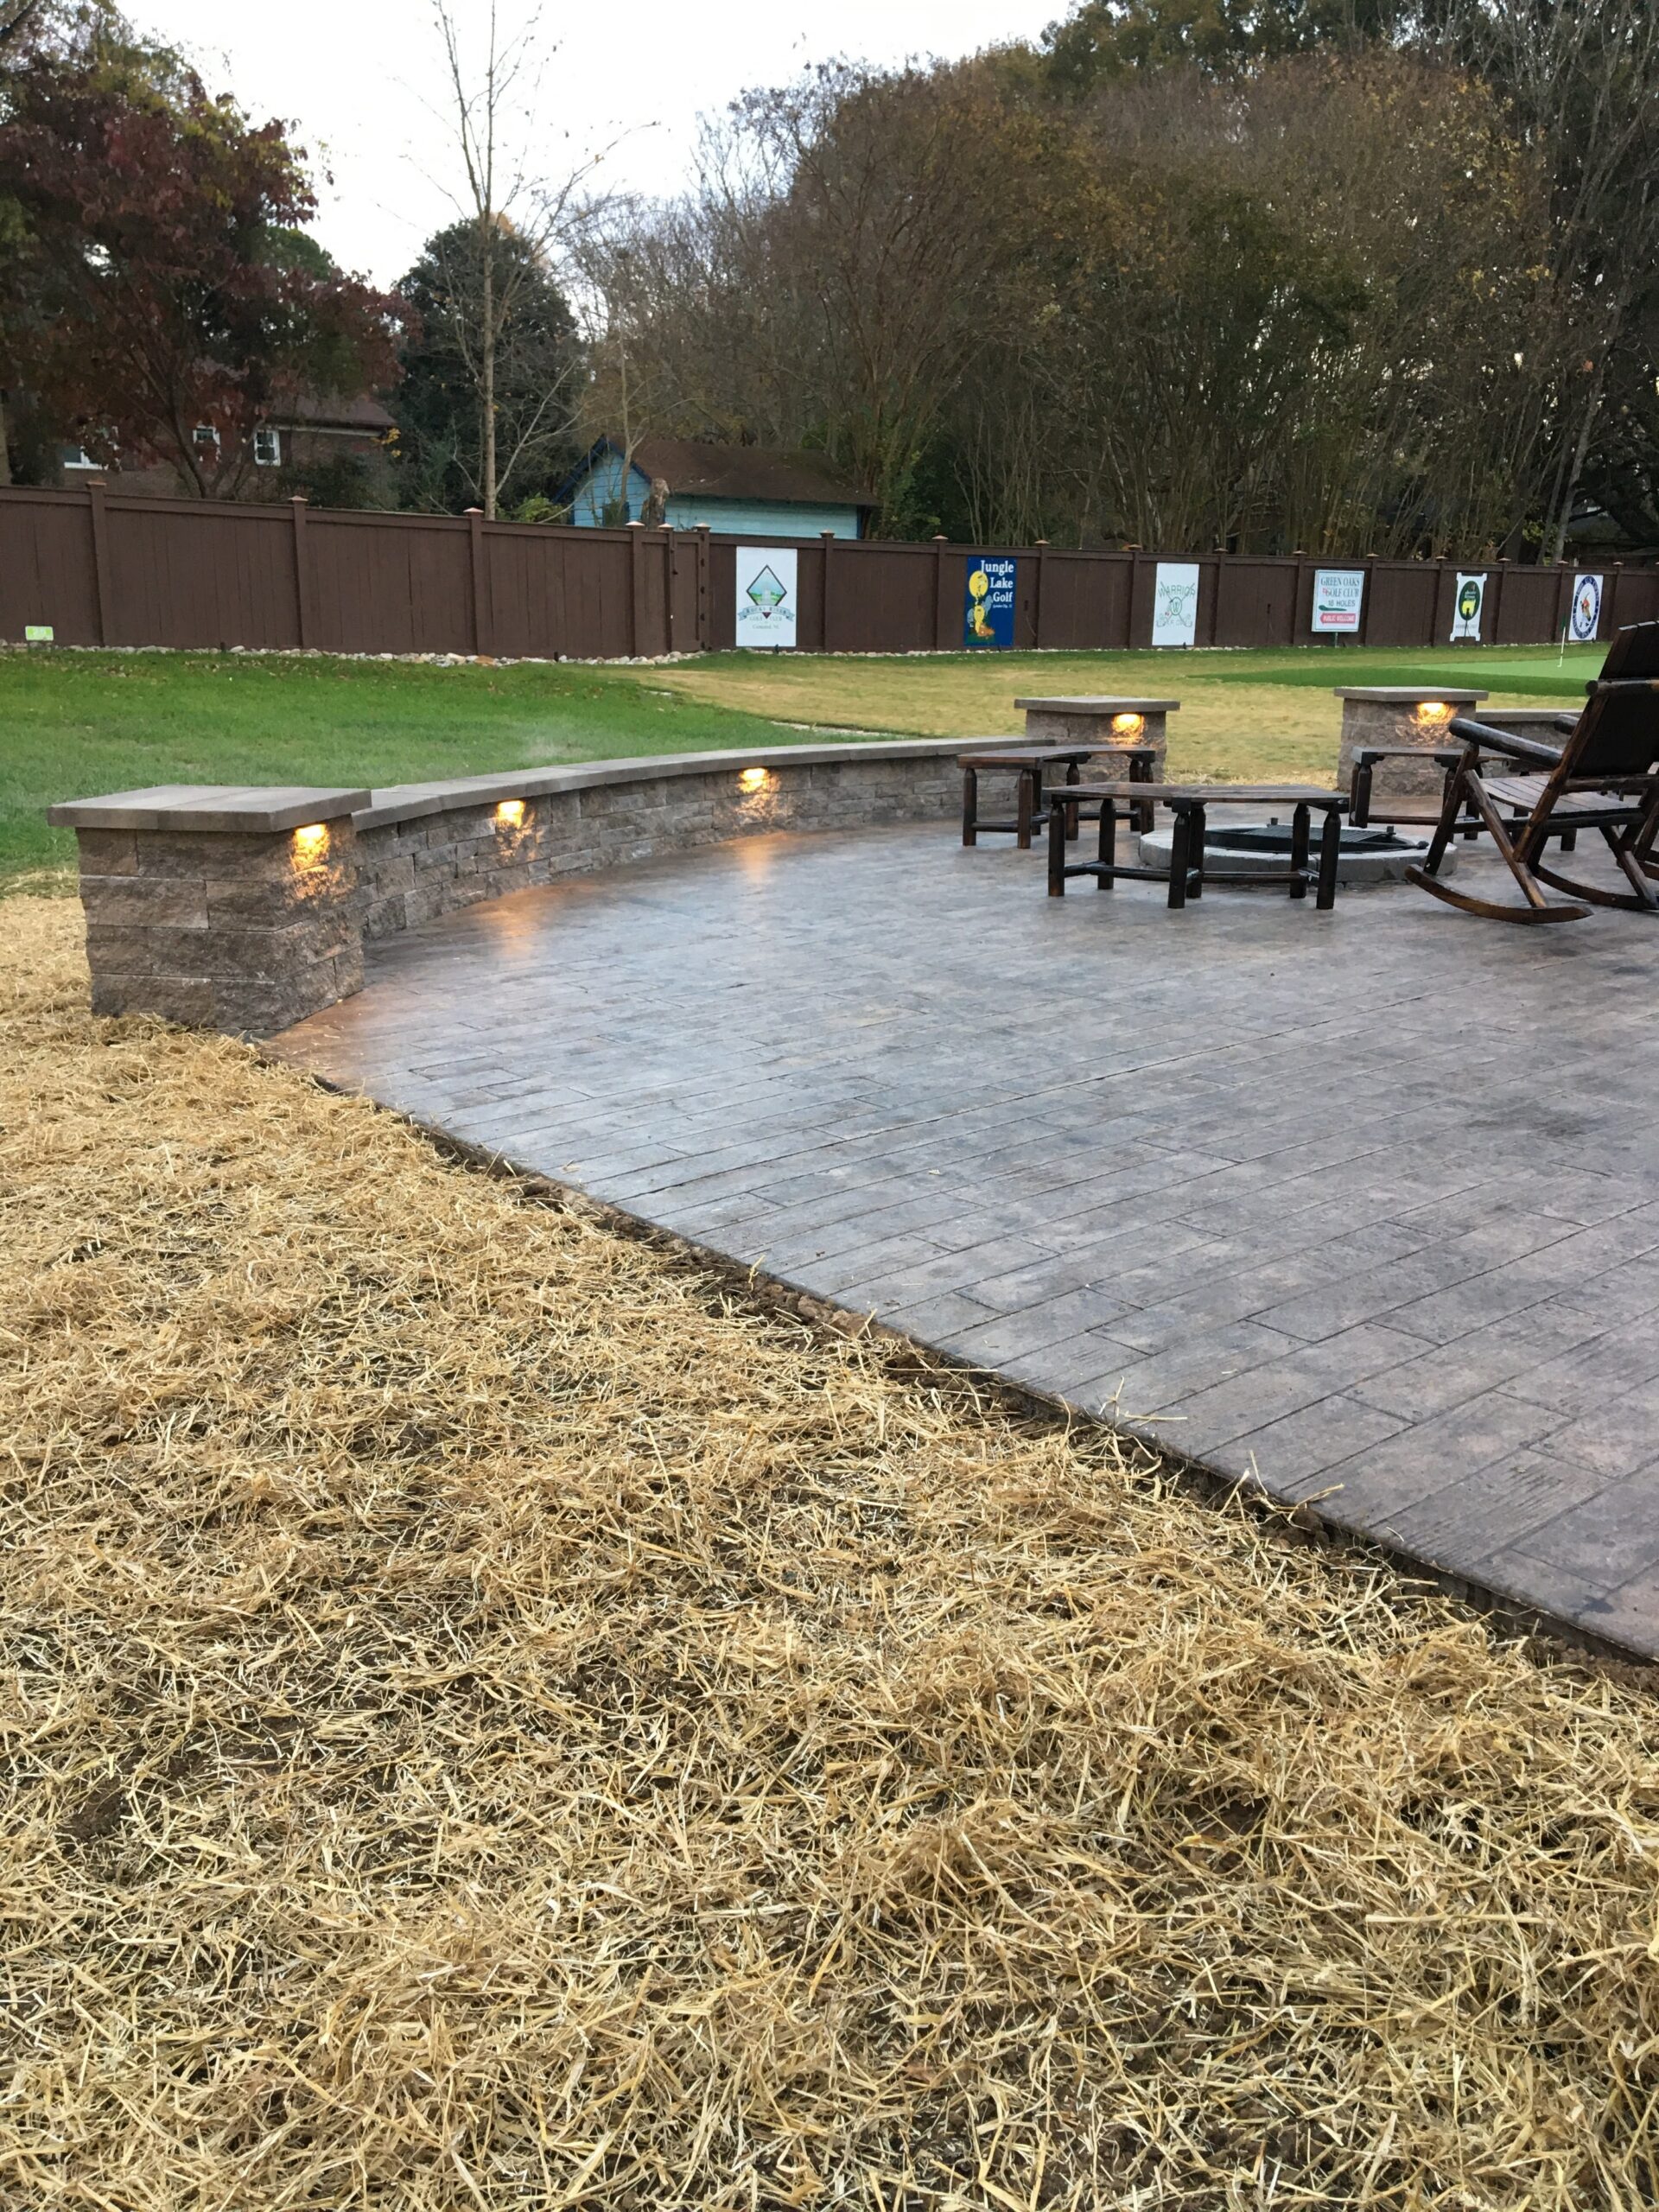
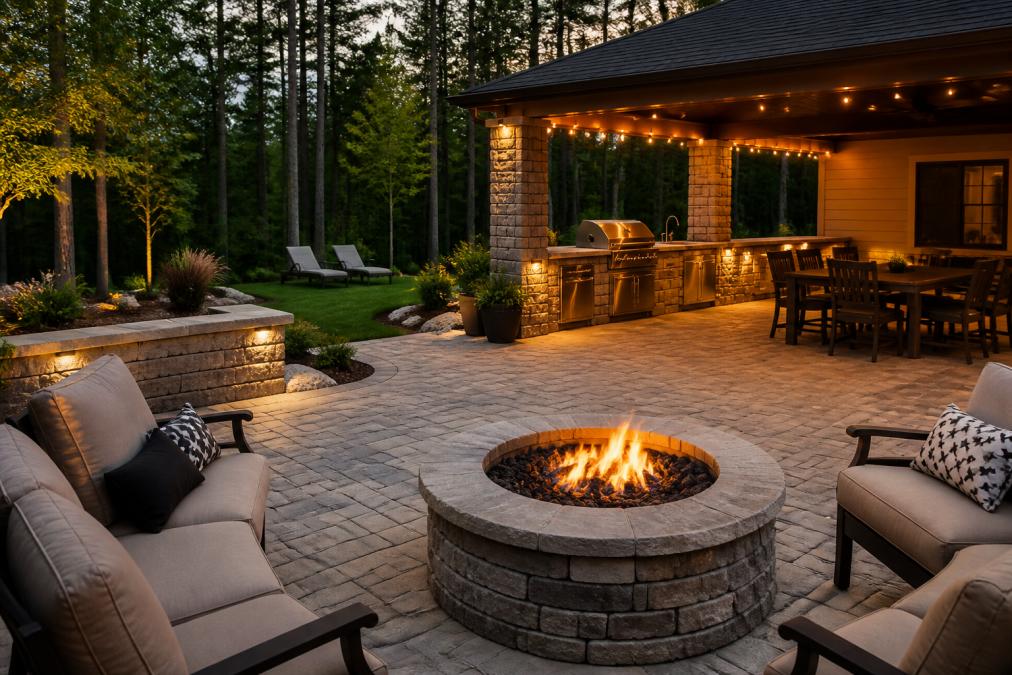
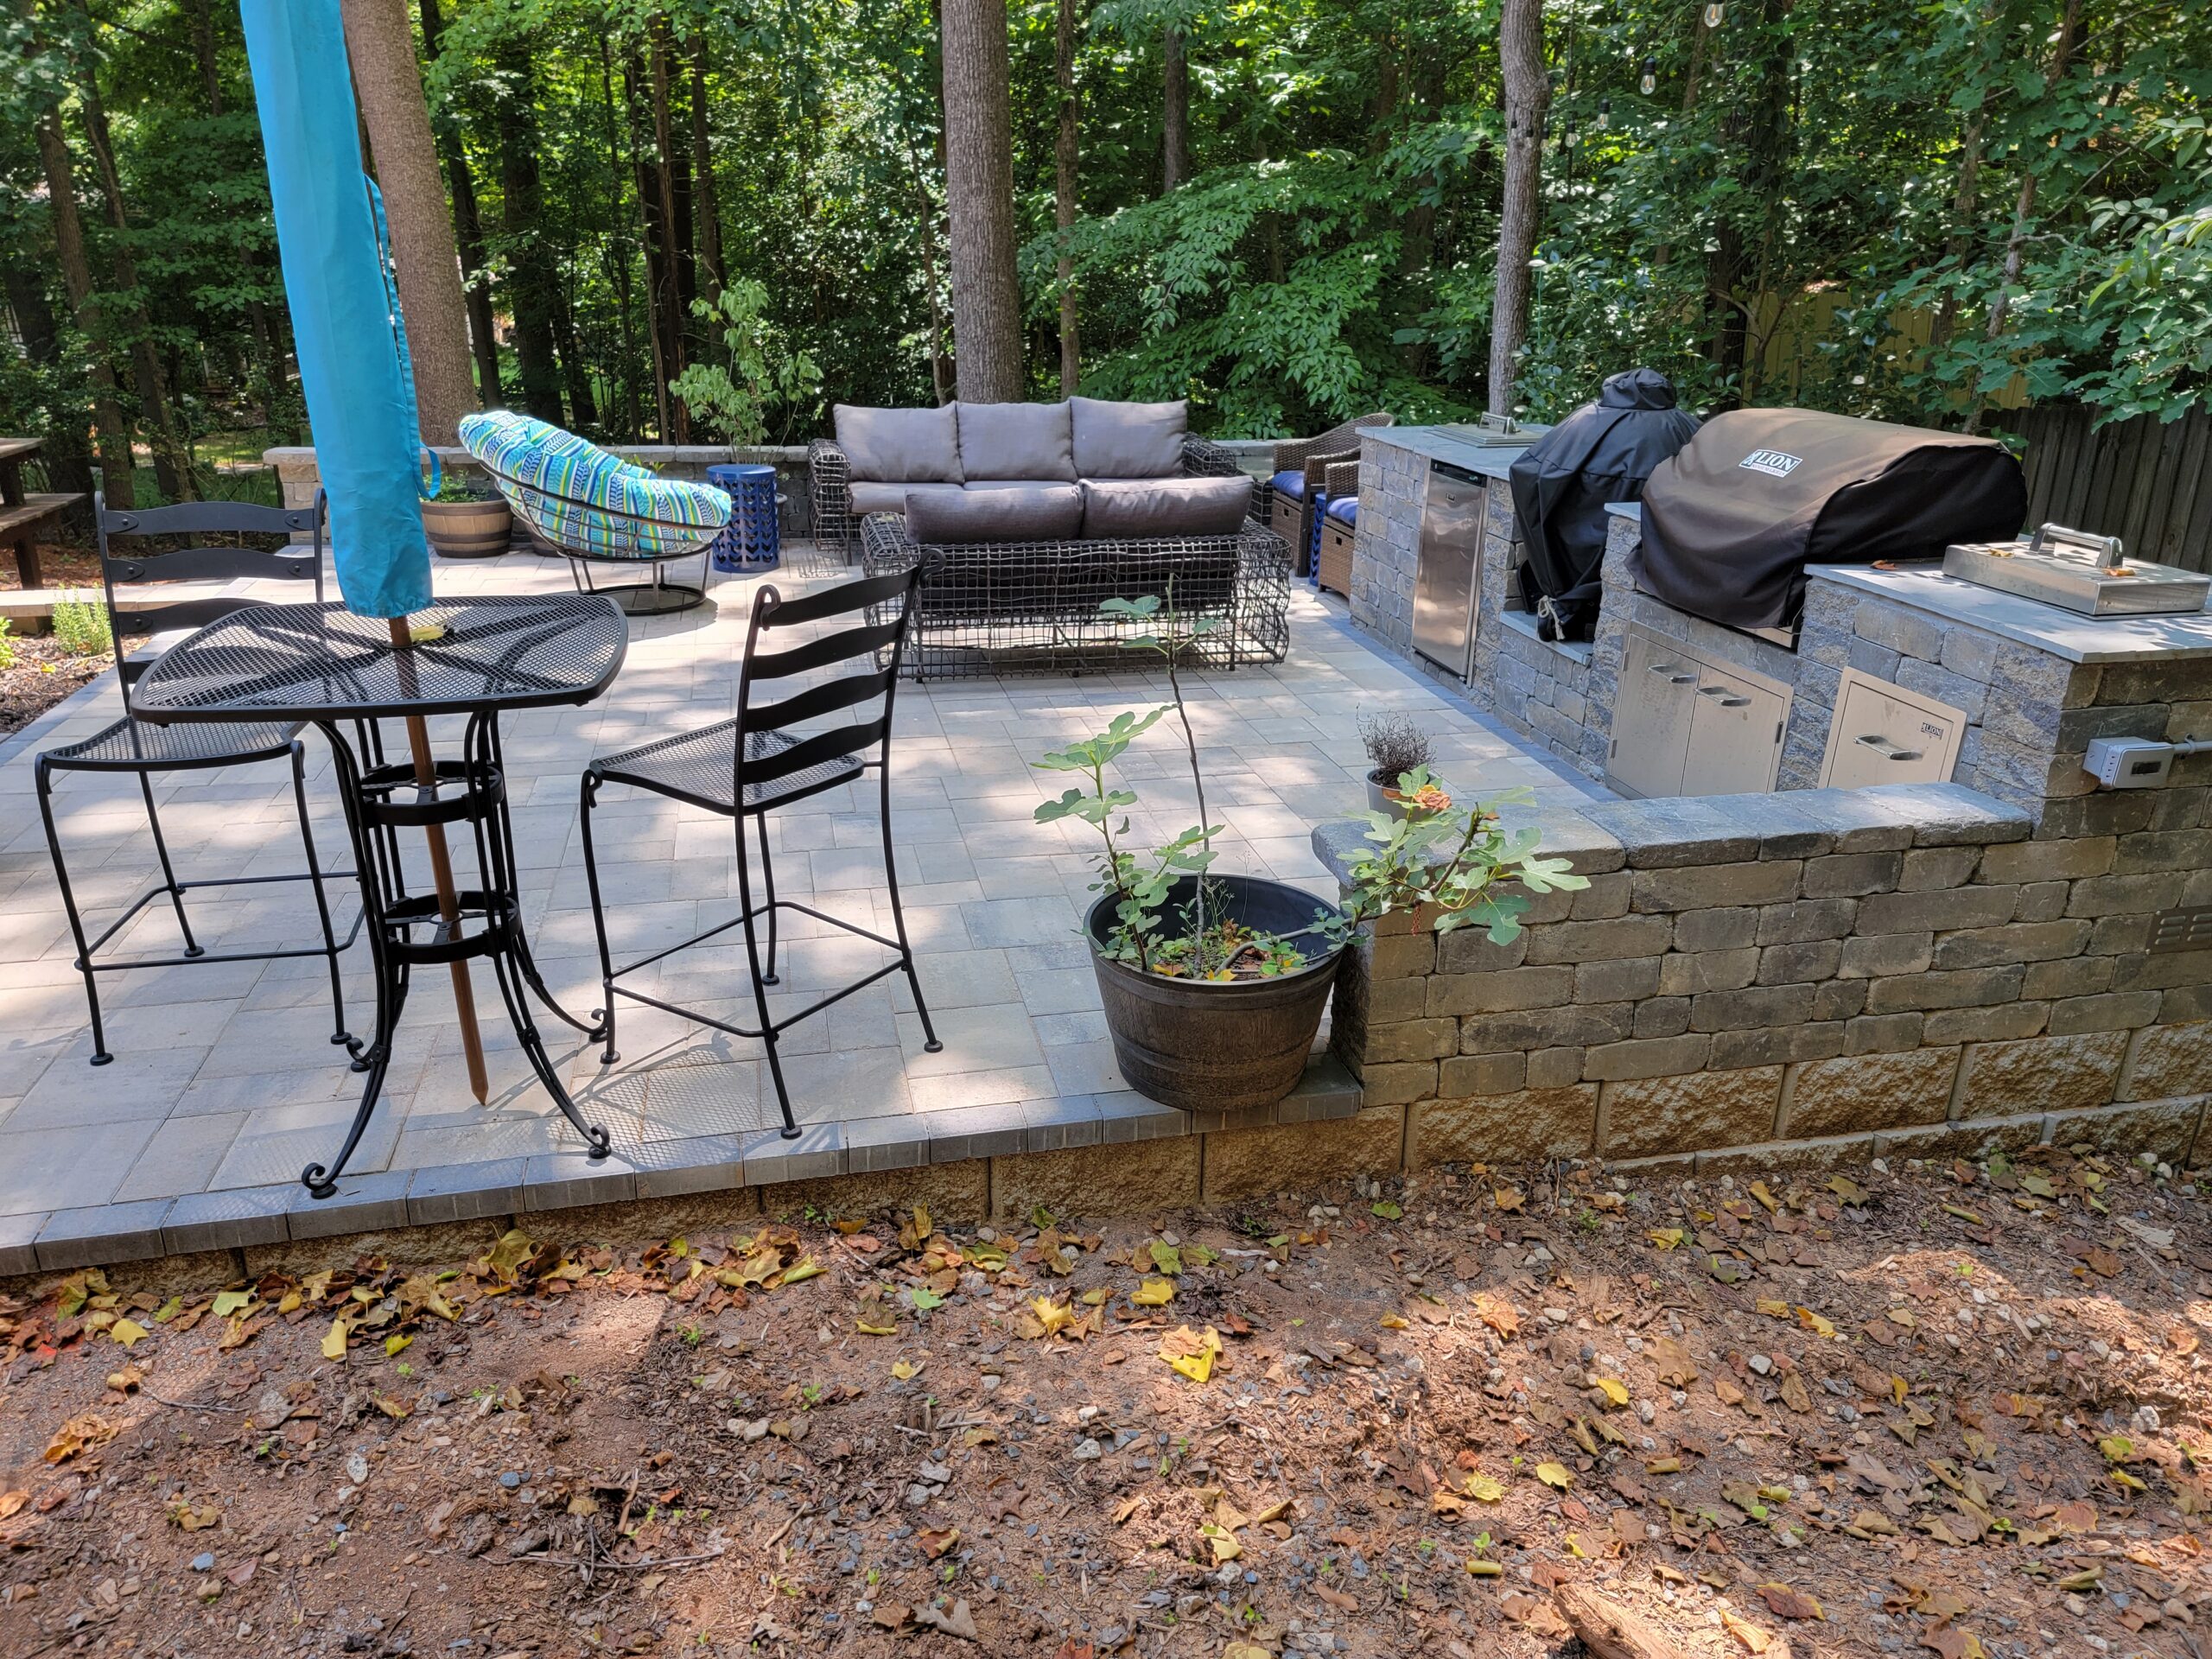
    The company project photo accompanying this guide shows a finished patio, a curved block seating wall and warm accent lights. It is an example of how these elements can be considered together, not a promise that the same layout suits every property.

    Look through our completed project gallery and note the specific details you like. A curve, a wall finish or a furniture arrangement is more useful feedback than simply asking for an identical backyard.

    Consider the surrounding space

    Include doors, existing paths, planting areas and the places where water collects in your planning notes. Explain anything you have noticed during rain. If you want a fire feature or outdoor cooking area, ask how the proposed layout will account for the selected equipment and its requirements before deciding where seating belongs.

    Our backyard living planning guide can help you organize the larger project. For a closer look at choosing a patio surface, read our paver and concrete patio comparison.

    Bring these questions to your estimate

    • How many people should the space comfortably accommodate?
    • Which furniture will stay, and which pieces might change?
    • Where do we need a clear walking route?
    • What should the lighting highlight after dark?
    • How will maintenance, controls and electrical work be handled?
    • What is included in the written scope, and what is optional?

    P&J Outdoor Creations LLC helps homeowners in Winston-Salem, Mocksville, Clemmons and nearby communities plan outdoor living projects. Request a free estimate or call 704-738-8064, Monday through Friday, 8 AM to 5 PM, to discuss your ideas.

  • Planning a Retaining Wall Project in Lexington, NC

    Planning a Retaining Wall Project in Lexington, NC

    A retaining wall project starts with questions about your yard, not just a choice of block color. Before requesting an estimate for your Lexington, NC home, gather the information that will help a contractor understand what you want to change and what needs a closer look.

    1. Describe the problem and the finished result

    Write down what prompted the project: a sloped area you want to use, soil moving toward a walkway, or an existing wall you want assessed. Then describe how you hope to use the finished space. A garden border, a change in yard level and a wall beside a driveway are different conversations.

    Bring a few photographs showing the whole area as well as details. Include nearby doors, steps, fences, patios and other features that need to work with the proposed layout. Inspiration photos help communicate appearance, but they do not establish which construction system suits your property.

    2. Bring information about the property

    If you have a property survey, site plan or records of previous work, make them available for the estimate. Point out known easements, irrigation, buried lines and areas where the yard has been filled or changed. Tell the contractor what you know and what remains uncertain.

    A fence or a change in mowing pattern should not be your only basis for deciding where to build. Ask how the proposed location will be checked against property boundaries and any applicable restrictions before construction begins.

    3. Make drainage part of the discussion

    Describe where water appears during rain and where it travels afterward. Photos taken safely from a dry location can help explain puddles, runoff or erosion that may not be visible on the day of the visit.

    Ask the contractor to explain how drainage will be addressed in the proposed wall design and where collected water would go. Do not assume a wall alone will resolve an existing drainage issue. If your concern involves water near the house, our foundation drainage checklist can help you prepare observations. Landscape work should not be presented as a substitute for evaluating a structural foundation problem.

    4. Ask who will handle design and approvals

    Before accepting a proposal, ask who will determine whether engineering, permits, inspections or other approvals are needed for this particular project. Request a clear division of responsibility for applications, fees and any required plans.

    A generic online wall-height rule is not a complete assessment of your site. Ask the contractor to identify the requirements that apply to the proposed location and design, and confirm unresolved questions with the appropriate local authority.

    5. Discuss access and the surrounding yard

    Show the route equipment and materials would take. Mention narrow gates, overhead obstacles, landscaping you want protected and places where materials could be staged. Ask what will happen to excavated material and how disturbed areas will be left when the work is complete.

    If the wall is part of a larger patio or walkway project, discuss the whole layout before treating each feature as a separate job. Our backyard planning guide offers questions for organizing an outdoor space around everyday use.

    6. Compare written scopes, not just totals

    Ask each proposal to identify the intended wall system, approximate layout, preparation, drainage, finish details and cleanup. Look for assumptions and exclusions as carefully as included work. Ask how unexpected conditions or requested changes would be documented and priced before proceeding.

    Discuss scheduling, payment stages and any written warranty directly with the contractor. Keep those terms specific to your proposal rather than relying on a general promise about how long every wall takes or how many years it will last.

    A short checklist for your estimate

    • Wide photos of the area and a description of your goals.
    • Available survey or site records.
    • Notes about water, previous changes and known buried features.
    • Your preferred appearance and any connected patio or walkway plans.
    • Questions about design, approvals, access, cleanup and written terms.

    P&J Outdoor Creations LLC provides retaining walls and outdoor construction services in Lexington, Mocksville, Winston-Salem and nearby communities. Request a free estimate to discuss your property and project goals.

    Frequently Asked Questions

    Can I get an accurate estimate from one photograph?

    A photo is a useful starting point, but it may leave questions about access, layout and site conditions unanswered. Ask what information or site visit is needed before relying on a final proposal.

    Should I choose the wall material first?

    You can collect appearance preferences early. Make the final selection alongside the site assessment and proposed design so the look, scope and project requirements are considered together.

    Can an existing wall simply be rebuilt in the same place?

    Ask for an assessment before assuming the original location or design should be repeated. Explain any movement, drainage concerns or changes nearby so those issues can be considered in the new proposal.

  • Paver Patio vs Concrete Patio for Clemmons NC Homes

    Paver Patio vs Concrete Patio for Clemmons NC Homes

    Choosing a patio for your Clemmons home starts with how you want to use the space. Pavers and poured concrete can both create a practical area for dining, seating and everyday outdoor use. The right choice depends on the design, site preparation, drainage, maintenance and the scope of your estimate.

    Compare the finished look and layout

    Pavers offer individual units arranged in patterns, with borders and contrasting colors. Poured concrete can have a simple broom finish or decorative treatments such as coloring and stamping. Compare actual samples and finishes alongside your home rather than choosing from a small online photograph alone.

    Before choosing a material, sketch your furniture, door openings, walking routes and any future outdoor features. A surface that looks good also needs to work with the way people move through the yard.

    Compare estimates with the same scope

    Ask for separate estimates for the same patio footprint and intended use. Include removal of existing material, site access, excavation, base preparation, drainage, finish details and cleanup. Decorative choices and difficult access can change either proposal, so a headline price per square foot does not tell the whole story.

    Ask what maintenance is recommended for each proposed product and what any written warranty actually covers. Do not assume either surface guarantees a particular lifespan or a return when you sell your home.

    Preparation matters for both surfaces

    The contractor should assess the ground beneath the patio and plan for the loads it will carry. Soil conditions vary by property; a town name alone does not establish what is under your yard. Ask how soft areas, existing fill and drainage will be addressed. Base depth and construction details should suit the site and selected system.

    Concrete can crack, but a crack does not automatically mean the whole patio has failed. The National Ready Mixed Concrete Association’s guide to concrete cracking explains the importance of subgrade preparation, joints and curing. Ask your installer to explain the joint layout and curing plan. Have significant movement or uneven surfaces assessed before choosing a repair.

    Plan for repairs and upkeep

    Individual pavers can be lifted and reinstated, which can help with localized repairs or access below the surface. Color matching and the condition of the underlying base still affect the result. Concrete repairs depend on the cause and extent of damage; a patch may remain visible.

    Both surfaces need cleaning and periodic inspection. For pavers, look for uneven units, damaged edges and joint material that needs attention. Follow the product instructions for joint sand, cleaning and any sealer. There is no single resealing or re-sanding schedule that fits every patio. The CMHA maintenance guide is a useful starting point for questions about paver care.

    Decide where rainwater will go

    Drainage belongs in the design before construction begins. Ask where water will flow from the patio and how the layout relates to doors, the house and neighboring property.

    Standard pavers should not be treated as a permeable drainage system simply because they have joints. A purpose-designed permeable pavement uses a specific construction system; ask whether the proposed design is suitable for your site. CMHA provides a guide to permeable pavement construction.

    If water already collects near the house, address that concern during planning. Our foundation drainage checklist explains what to observe. Exterior landscape drainage work is separate from diagnosing or repairing structural foundation problems.

    Choose the option that fits your priorities

    For a paver proposal, discuss patterns, border details and localized repair options. For a concrete proposal, discuss finish, joint placement and care requirements. For either, ask about required approvals, drainage and preparation before comparing the total price.

    P&J Outdoor Creations LLC provides paver patios, concrete work and other outdoor construction services in Clemmons and nearby communities. Request a free estimate to discuss your layout and compare options for your property.

    Frequently Asked Questions

    Is it cheaper to do a paver patio or concrete?

    Compare written estimates for the same size, preparation, access, drainage and finish. The total depends on the project; neither material is always the cheaper choice.

    Does a paver patio add value to a house?

    A patio can improve how you use your yard, but a specific increase in resale value is not guaranteed. Choose a design and budget that suit your household.

    What are the downsides of using pavers?

    Pavers have joints and individual units that need periodic inspection. Joint material, edges and any settled areas may need attention. Ask for maintenance guidance for the selected products.

    How do pavers and concrete handle the local climate?

    Both need a design suited to the site. Concrete needs appropriate preparation, joints and curing; pavers need a suitable base and edge details. Neither is immune to damage or settlement.

  • How to Plan a Paver Patio in Winston-Salem NC

    How to Plan a Paver Patio in Winston-Salem NC

    Planning a paver patio in Winston-Salem starts with your yard, your goals and a practical layout. P&J Outdoor Creations LLC helps homeowners plan outdoor spaces for meals, gatherings and everyday relaxation. Here are the questions to work through before choosing a paver pattern.

    Start with how you will use the space

    List the furniture and features you want: a dining table, lounge chairs, a grill, a fire pit or a walkway to the driveway. Leave room to pull out chairs and walk around furniture. Consider views from inside your home, shade during the day and convenient access to doors.

    Mark a possible outline on the ground and compare it with the dimensions of your furniture. A thoughtful layout can be more useful than simply choosing the largest patio that fits.

    Look at the site before selecting materials

    Note slopes, low spots, downspouts, trees and existing walkways. Share photographs of standing water after rain with your installer. Soil conditions and access for equipment affect preparation, drainage and the project estimate.

    Discuss the location of utilities and any private underground lines before excavation. Confirm property boundaries, easements and applicable approvals with the appropriate local offices and your homeowners association before construction begins.

    Compare paver styles and practical details

    Choose colors and textures that complement your home. Ask to see samples outdoors, where light and moisture can change their appearance. Consider surface comfort, maintenance, border details and how replacement units could be matched later.

    Concrete pavers offer many shapes and patterns. Natural stone provides a different appearance and installation approach. Permeable paving is a complete drainage system that needs a site-specific design; it is not an automatic solution for every wet yard.

    Make drainage part of the design

    The plan should explain where water will go from the patio and nearby roof areas. Surface grading, downspout routing and any additional drains should work together. Avoid directing runoff toward the house or creating a problem for neighboring properties.

    If your yard already has standing water, discuss yard drainage solutions before installing the finished surface. Where a slope requires a wall, include retaining wall planning in the same conversation.

    Ask what is included beneath the pavers

    A finished patio depends on preparation below the surface. Ask your installer to explain excavation, the base system, bedding material, edge restraint and joint treatment. The correct materials and depths depend on the site and the paving system rather than one rule for every yard.

    Installation and finishing should follow the selected product manufacturers’ instructions. Ask how the crew will handle soft areas, access restrictions and drainage details if conditions differ from the initial assessment.

    Compare complete estimates

    Compare the same scope when reviewing proposals. Look for clear descriptions of demolition or excavation, materials, drainage work, borders, cleanup and restoration of disturbed areas. Discuss whether steps, lighting, walls or future outdoor features are included.

    Ask who will coordinate any required approvals, what the payment schedule is and how changes are handled. Request a project-specific schedule that accounts for materials, site conditions and weather rather than assuming every patio takes the same number of days.

    See real project ideas

    Browse our project gallery and save examples of layouts, borders and features you like. Photos help explain your preferences, while a visit to your property helps determine what will work there.

    Learn more about our paver patios and walkways, or request a free estimate. P&J Outdoor Creations LLC serves Winston-Salem, Mocksville, Lewisville, Clemmons and nearby communities. Call (704) 738-8064 Monday through Friday, 8am–5pm, to discuss your project.

    Frequently Asked Questions

    How much does a 20×20 paver patio cost?

    The cost of a 20×20 paver patio varies significantly based on material selection, site prep, and local labor rates. For an accurate estimate tailored to your project, contact P&J Outdoor Creations LLC for a free consultation. We will assess your yard and provide a detailed quote.

    What are common mistakes to avoid when laying pavers?

    The most common mistakes include skipping the sub-base, which leads to settling, and neglecting proper drainage, which causes water pooling. Rushing the layout without a plan often results in awkward cuts. Hiring an experienced hardscaping professional helps avoid these issues.

    Can I lay pavers directly on dirt?

    No, laying pavers directly on dirt will lead to an uneven and unstable patio. A proper paver patio installation process requires excavating the area and building a sub-base of crushed stone, compacted in layers. This stable foundation prevents shifting and ensures the patio lasts for years.

    What permits are required for patio construction in Winston-Salem, NC?

    Permitting requirements for paver patios can vary by municipality, so it's essential to check with the Forsyth County or Winston-Salem planning department. A professional hardscaping contractor like P&J Outdoor Creations LLC will be familiar with local codes and can help guide you through the process.

  • Water Near Your Foundation: A Homeowner’s Drainage Checklist

    Water Near Your Foundation: A Homeowner’s Drainage Checklist

    Water collecting beside a house deserves a closer look, especially when it returns after ordinary rainfall. A useful drainage plan starts with the source of that water and a suitable route away from the building. It does not begin with assuming that every property needs the same drain.

    This guide helps homeowners around Winston-Salem and Mocksville prepare for a drainage assessment. Landscape drainage work can address runoff and wet ground, but it is not a substitute for evaluating structural damage, plumbing leaks or water entering a building.

    Record what happens when it rains

    From a safe position, photograph overflowing gutters, downspout outlets, ponding beside walls and water arriving from uphill. Note when the wet area appears and how long it remains. Compare light rainfall with heavier storms when possible.

    Also note whether the problem appeared after a patio, driveway, planting bed or neighboring project changed. These observations help explain the sequence of events, but they do not establish a diagnosis by themselves.

    Check roof runoff and the outlet

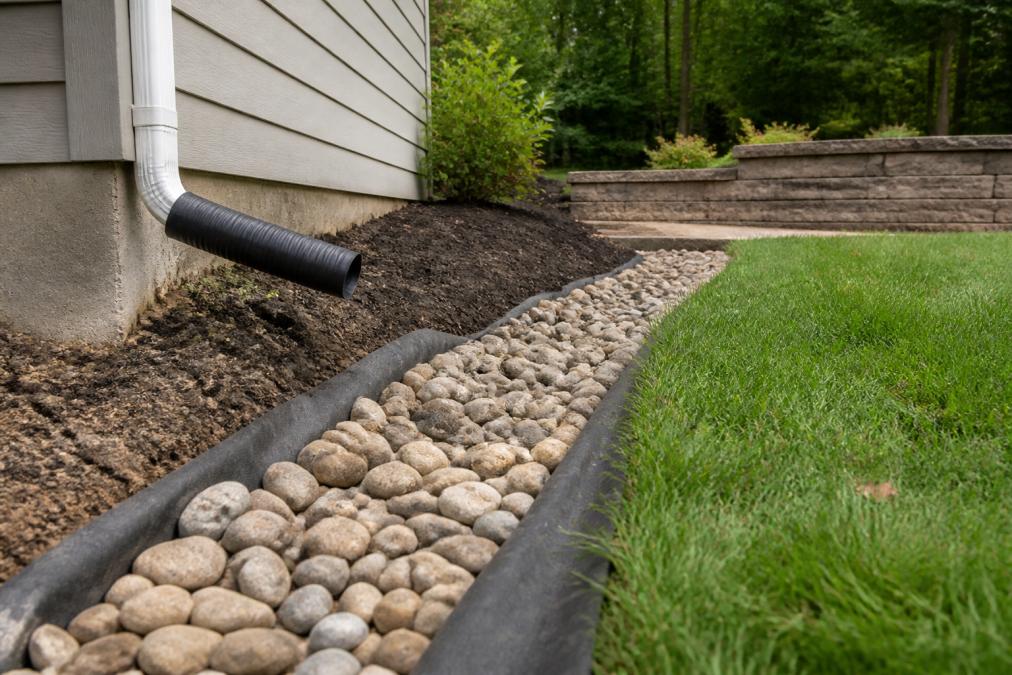
    Gutters and downspouts concentrate water from the roof. A blocked gutter or separated outlet can place that water near the house. An extension can help only if its destination is appropriate; moving the outlet into another low spot may simply move the problem.

    NC State’s rainscaping guidance describes directing roof runoff toward suitable planted areas. The route should account for soil drainage, nearby structures and overflow. Keep access routes clear and avoid directing concentrated runoff onto neighboring property.

    Look at grades and nearby surfaces together

    Review the ground, paths, driveway and patio as one system. A surface sloping toward the house or a settled strip beside it may contribute to ponding. The remedy depends on elevations, clearances and where the water can safely discharge.

    Do not cover siding, vents or other building details with fill. Have proposed changes checked against the building and local requirements. Excavating beside a foundation requires particular care because buried utilities and structural elements may be present.

    Match the drain to the water source

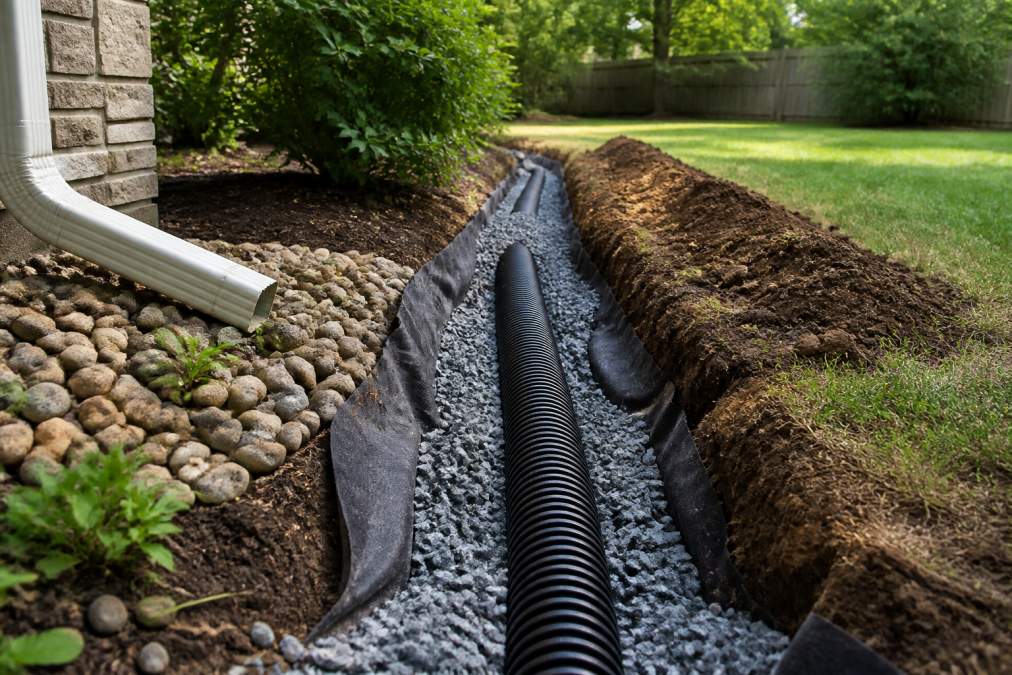
    A surface inlet or channel drain collects water flowing across the ground or paving. A French drain uses permeable aggregate and perforated pipe to collect water from surrounding ground. A solid conveyance pipe carries collected water toward an outlet. These components perform different jobs and should not be treated as interchangeable.

    Ask the installer to explain why a proposed drain belongs in that location, what it will collect and where it will discharge. Pipe size, trench depth, filter materials and outlet details need to suit the site. A fixed installation depth or completion time cannot be promised from a photograph alone.

    For a comparison of broader landscape options, see our seven backyard drainage solutions.

    Know when another specialist is needed

    If you see new or worsening cracks, movement, repeated water entry or persistent interior dampness, arrange an assessment by a qualified professional appropriate to the problem. Exterior drainage may be one part of the response, but it does not automatically resolve every cause of moisture or structural distress.

    Do not enter flooded areas where electricity may be present. For an active emergency, use the appropriate emergency or utility service. Avoid excavation or experimental repairs near the foundation while the cause remains unclear.

    Ask for a complete scope of work

    A drainage proposal should identify the problem being addressed and the limits of the work. Discuss:

    • The observed water source and proposed collection points.
    • The discharge location, access and any required approvals.
    • Utility locating, excavation and protection of existing structures.
    • Materials, cleaning access and restoration of disturbed areas.
    • How unexpected site conditions will be handled.
    • What the contractor will check at completion and what maintenance is needed.

    Ask separately about any warranties and exclusions. Do not assume that a landscape drainage installation includes foundation repair, waterproofing or a guarantee against all future water intrusion.

    Maintain and observe after the work

    Keep accessible grates and outlets free of leaves and sediment. After rain, observe the route and report new ponding or erosion. Follow the installed system’s maintenance guidance instead of forcing equipment into buried pipe.

    Keep photographs and the project scope for reference. They provide a useful record if the landscape changes or the problem returns.

    Discuss exterior drainage with P&J

    P&J Outdoor Creations LLC provides yard drainage and grading services alongside hardscaping and outdoor construction. Share photographs, the timing of the problem and your goals so we can discuss the exterior work your property may need.

    Request a free estimate or call (704) 738-8064, Monday–Friday, 8am–5pm.

    Any AI-generated images accompanying this guide are illustrations, not photographs of completed P&J projects.

    Frequently Asked Questions

    How do I redirect water drainage away from my foundation?

    Start by identifying roof runoff, surface slopes and a suitable discharge route. Have changes evaluated for your site and avoid directing water toward buildings or neighboring property.

    What is the most effective drainage system for residential properties?

    There is no single best system for every yard. The choice depends on the source of water, elevations, soil, outlets and existing structures.

    Does exterior drainage work repair foundation damage?

    Not by itself. Structural movement or water entering the building requires an appropriate professional assessment. Landscape drainage can be part of a broader solution.

    Should I install drainage solutions myself or hire a professional?

    Simple observations and clearing accessible debris may be manageable. Excavation, utility conflicts, work beside foundations and uncertain discharge routes deserve qualified help.

  • Backyard Living Spaces: A 2026 Planning Guide

    Backyard Living Spaces: A 2026 Planning Guide

    A useful backyard starts with a plan for everyday life. Before choosing paver colors or a pergola, decide how you want to use the space: family meals, quiet evenings, cooking, play or a mix of activities.

    For homeowners around Winston-Salem, Mocksville, Clemmons and Lewisville, a good plan connects those goals with the yard’s slope, drainage, access and maintenance needs. This guide explains the decisions to make before requesting a construction estimate.

    Start with how you will use the space

    List your must-haves separately from features that can wait. A comfortable place to eat may matter more than a large outdoor kitchen. A shaded seating area may be more useful than extra paving that receives full afternoon sun.

    Measure the furniture you intend to use, including chairs when pulled back. Mark a possible layout with a hose or temporary markers and walk through it. Check routes from the house to the grill, lawn and storage areas. Allow enough room for the people who will use the yard, including any mobility needs.

    Understand the yard before choosing a layout

    Photograph the yard at different times of day to understand sunlight and shade. After rain, note wet spots and the direction of runoff. Identify utilities, trees, easements and areas where equipment can enter.

    A sloping yard may need a different layout from a level lot. Terracing can create usable areas, but retaining walls, steps and drainage add design considerations. Ask which parts of the plan depend on grading or structural work before committing to a layout.

    Choose a patio that fits the house and the way you live

    Compare patio and paver options using physical samples when possible. Look at color beside your siding or brick, and ask about surface texture, care requirements and suitability for the installation.

    The visible material is only part of the project. Discuss excavation, base preparation, edge restraint and water movement with the contractor. A decorative pattern will not compensate for a base or drainage plan that does not suit the site.

    For a smaller yard, consider a compact layout with a clear purpose rather than squeezing in every feature. For a larger yard, connect distinct areas with practical walking routes.

    Plan shade and structures early

    A pergola can define a seating area, but the shade it provides depends on its design, orientation and covering. An open pergola does not provide the same rain protection as a roofed structure.

    Discuss post locations, footings and any utility routes before paving. If you want to add a structure in a later phase, include that goal in the initial plan so its requirements can be considered before finished surfaces are installed.

    Give cooking and fire features enough room

    Start with the equipment you actually want to use. Consider prep space, storage, lighting and a convenient route to the house. Appliance dimensions, ventilation and required clearances should guide the layout.

    For grills and fire features, follow the manufacturer’s placement instructions and applicable local requirements. Keep seating and circulation routes out of hot or smoky areas. Discuss gas and electrical work with appropriately qualified tradespeople rather than treating utility connections as furniture details.

    Include drainage in the design

    A patio should be planned with the surrounding ground and a suitable water discharge route. Look at runoff from the roof as well as water arriving from uphill. Gravel borders and decorative stone alone do not guarantee that water will drain.

    The right approach may involve grading, a surface inlet, a channel drain or a subsurface system. Ask what problem each proposed feature solves and where the water will go. Our guide to seven backyard drainage options explains the differences.

    Confirm approvals before construction

    Ask the local building and zoning offices which approvals apply to the actual project. Avoid assuming that one height or size threshold covers every retaining wall, deck or shade structure. Property conditions and the way a structure is built can matter.

    Review any HOA requirements and identify easements. Make clear in the proposal who will obtain required approvals, coordinate utility locating and arrange inspections.

    Build an estimate around a defined scope

    A useful estimate should explain materials, preparation, drainage work and restoration of disturbed areas. Ask how access, demolition, unsuitable soil or changes to the design would affect the price.

    • What dimensions and materials are included?
    • What preparation and drainage work are included?
    • Who handles permits and specialized trades?
    • How will the lawn or surrounding areas be restored?
    • What happens if unexpected conditions are found?
    • What care will the completed installation require?

    If you plan to build in phases, discuss the full vision first. The early work should accommodate later additions where practical. Do not assume that an outdoor project guarantees a particular resale return; choose features that suit your household and budget.

    Plan your outdoor living space with P&J

    P&J Outdoor Creations LLC offers patios, retaining walls, drainage and other outdoor construction services. Share your priorities, yard photographs and any inspiration images so we can discuss a plan for your property.

    Request a free estimate or call (704) 738-8064, Monday–Friday, 8am–5pm.

    Any AI-generated images accompanying this article are illustrations, not photographs of completed P&J projects.

    Frequently Asked Questions

    What features add the most value to a backyard?

    Start with features your household will use, such as dining space, shade and practical walking routes. Resale results vary; no individual patio, pergola or kitchen guarantees a return.

    How much does outdoor living space cost?

    The cost depends on the design, materials, preparation, access and drainage work. Request an itemized estimate for your property rather than relying on a generic price.

    Do I need a permit to build a patio or pergola?

    Ask your local building and zoning offices about the specific project before construction. Confirm any HOA requirements and identify who will handle approvals.

    How do I plan a layout for a small backyard?

    Choose your main activity, measure the furniture and mark a layout before building. Test access and circulation, then consider shade and drainage.

  • How to Fix Drainage in Your Backyard: 7 Solutions

    How to Fix Drainage in Your Backyard: 7 Solutions

    Standing water, washed-out mulch and a patio that stays wet can make your backyard difficult to use. The right fix starts with finding where the water comes from, how it moves and where it can safely go. A drain installed in the wrong place may leave the original problem unsolved.

    For homeowners around Winston-Salem, Mocksville, Clemmons and Lewisville, the options below can help frame a conversation about yard drainage. The best choice depends on the property’s slope, soil, available outlet and nearby buildings.

    Start by tracing the water

    Take photographs during and after rain from a safe location. Note overflowing gutters, downspout outlets, water crossing pavement and low areas that remain wet after the rest of the yard dries. Recurring ponding deserves investigation, but a puddle alone does not identify the soil type or prove a foundation problem.

    Before excavation, arrange utility locating and identify private irrigation, lighting and other buried lines. Check local requirements and drainage easements before changing runoff patterns. A drainage plan should avoid sending concentrated water onto neighboring property or toward a building.

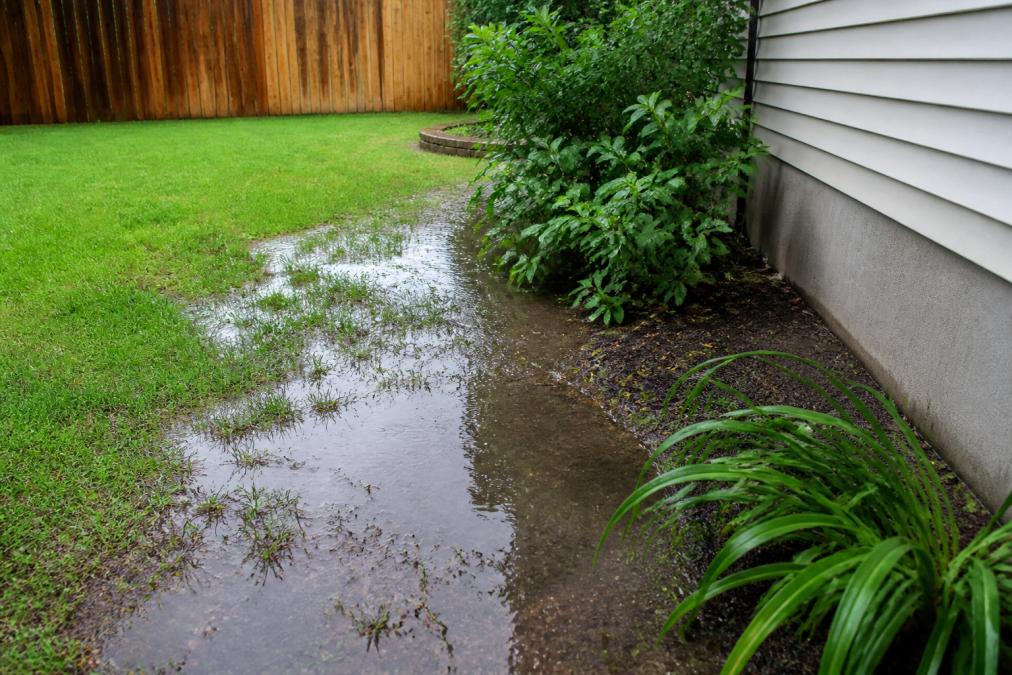
    Illustration of standing water in a backyard near a house
    AI-generated illustration of backyard ponding; not a photograph of a completed P&J project.

    1. Clear gutters and redirect downspouts

    Start at the roof when wet areas appear near a downspout. Blocked gutters, disconnected elbows or an outlet aimed at a low spot can concentrate runoff. Clear accessible debris safely and have unsafe roof work handled by a qualified professional.

    An extension may help move water toward a suitable landscaped area. Its destination matters as much as its length: avoid a route that returns water to the house or creates a slippery walkway. NC State’s rainscaping guidance describes dispersing roof runoff over planted areas where site conditions allow.

    2. Correct low spots and grading

    Look for settled areas beside paths, patios and foundations. Regrading can improve surface drainage when there is a suitable downhill route, but simply adding soil can transfer the puddle elsewhere.

    The slope, fill material and compaction method should suit the location. Foundation clearances, tree roots, utilities and neighboring grades all limit what can be changed. Avoid treating a single slope percentage as the correct specification for every yard or surface.

    3. Use a French drain for suitable subsurface problems

    A French drain generally uses permeable aggregate and perforated pipe to collect water from the surrounding ground. It needs an appropriate outlet and a design matched to the soil and water source.

    Pipe size, trench depth, filter materials and installation details vary. A generic trench recipe is not a substitute for checking elevations and the discharge location. If the main problem is fast-moving water on a patio, a surface inlet or channel drain may be a better fit.

    4. Guide runoff with a swale or dry creek bed

    A swale is a shallow landscape channel that guides surface water. A dry creek bed uses stone to create a defined flow path. Both need a planned route and enough capacity for the runoff they receive.

    Stone alone does not make water disappear. A poorly placed channel can collect sediment, erode at its outlet or direct water into another problem area. Clay soil does not automatically rule out a swale, but it affects how much water can soak in rather than flow onward.

    Explore our drainage solutions if you need help evaluating runoff around your outdoor space.

    5. Consider a rain garden where soil and space allow

    A rain garden captures runoff in a planted depression and allows it to filter into the soil. It belongs away from the foundation and requires an assessment of drainage, size and overflow. NC State recommends checking that a rain garden drains within three days; persistently wet ground may call for a different design. See its rain garden planning guidance.

    Choose this option because the site supports it, rather than simply because a spot is already wet.

    6. Collect patio or driveway runoff with a channel drain

    A surface channel drain collects water through a grate and carries it through a channel to an outlet connection. It is different from a buried French drain; a perforated pipe inside the channel is not a universal part of its design.

    For patios and driveways, the surrounding surface must slope toward the inlet. Choose a system suited to expected runoff and any vehicle loads, and follow its installation requirements. Include access for cleaning and a suitable discharge route.

    7. Plan permeable paving as a complete system

    Permeable paving can be an option when redesigning a patio or walkway. Its performance depends on the joints, supporting aggregate, underlying soil and drainage design, rather than the visible pavers alone.

    It is not a guaranteed cure for a wet yard. Ask how the system will store and release water, whether an underdrain is needed and how its surface will be maintained. See our patio and paver services when planning the wider outdoor space.

    Keep the solution working

    After storms, check accessible grates and outlets for leaves, sediment and erosion. Keep drainage paths clear and follow the installed system’s maintenance instructions. Avoid forcing tools or high-pressure equipment into buried pipes without knowing their condition.

    If ponding returns, investigate the cause instead of repeatedly adding more gravel or soil. Changes uphill, a blocked outlet or settlement may need attention.

    Questions to ask before starting

    • What is the main source of the water?
    • Where will the collected water discharge?
    • Will the work affect neighboring property, utilities or existing structures?
    • What maintenance and access will the system require?
    • What is included in the estimate, including restoration of disturbed areas?

    Plan a drainage improvement for your yard

    P&J Outdoor Creations LLC provides drainage and grading services alongside patios, retaining walls and outdoor living improvements. Share photographs of the problem and explain when it occurs so we can discuss your property and the work needed.

    Request a free estimate or call (704) 738-8064, Monday–Friday, 8am–5pm.